自從 Let’s encrypt 在 2018 年 3 月推出萬用字元憑證後,就一直想把自己的網域全部換上好棒棒的加密憑證。不過事與願違的就是總是忙忙忙忙忙,很少有能靜下來的時間。
不過實際上在電子前鋒基金會 (EFF) 推出 certbot 後,要佈署或更新 Let’s encrypt 憑證的複雜度已經大幅度地簡化了,剩下的就是自己何時能衝一波完成升級的願望。
主要參拜了 Generate Wildcard SSL certificate using Let’s Encrypt/Certbot 這篇文章的教學。我自己的主機原本就有 git、certbot 了,申請萬用字元憑證根本簡單到十分鐘內就完工了。這真是太神奇了,傑克。
certbot certonly --manual --preferred-challenges=dns --email xxx@mail.com --server https://acme-v02.api.letsencrypt.org/directory --agree-tos -d *.qoding.us
以上是以我自己的網域 qoding.us 為例子,請自行替換。執行這行指令後會收到一串訊息,別急著按掉,這串密文要填入你的 DNS record。
– – – – – – – – – – – – – – – – – – – – – – – – – – – – – – – – – – – – – – – –
Please deploy a DNS TXT record under the name
_acme-challenge.qoding.us with the following value:
koIg48ThCRwhZ7yhYCNQykqdW5WkoqzzF7Dz5nEv40C
Before continuing, verify the record is deployed.
– – – – – – – – – – – – – – – – – – – – – – – – – – – – – – – – – – – – – – – –
在你的 DNS 服務商新增一筆 TXT Record,名稱為 _acme-challenge,內容就是那串密文 koIg48ThCRwhZ7yhYCNQykqdW5WkoqzzF7Dz5nEv40C。設定完成後下一步,待 certbot 驗證完成後就 OK 了。
可以用 certbot certificates 指令查詢簽發的憑證。我之前有申請過一組,所以查詢結果會是兩組 certs。
Saving debug log to /var/log/letsencrypt/letsencrypt.log
- - - - - - - - - - - - - - - - - - - - - - - - - - - - - - - - - - - - - - - -Found the following certs: Certificate Name: backjoy.qoding.us Domains: backjoy.qoding.us Expiry Date: 2019-09-13 14:12:10+00:00 (VALID: 83 days) Certificate Path: /etc/letsencrypt/live/backjoy.qoding.us/fullchain.pem Private Key Path: /etc/letsencrypt/live/backjoy.qoding.us/privkey.pem Certificate Name: qoding.us Domains: *.qoding.us Expiry Date: 2019-09-20 11:06:22+00:00 (VALID: 89 days) Certificate Path: /etc/letsencrypt/live/qoding.us/fullchain.pem Private Key Path: /etc/letsencrypt/live/qoding.us/privkey.pem- - - - - - - - - - - - - - - - - - - - - - - - - - - - - - - - - - - - - - - -

一共會產出四個憑證相關檔案,將他們填入 Apache vhost 設定中。
<VirtualHost speed.qoding.us:443>
SSLEngine on
SSLCertificateFile /etc/letsencrypt/live/qoding.us/cert.pem
SSLCertificateKeyFile /etc/letsencrypt/live/qoding.us/privkey.pem
SSLCertificateChainFile /etc/letsencrypt/live/qoding.us/chain.pem
SSLCACertificateFile /etc/letsencrypt/live/qoding.us/fullchain.pem
ServerName speed.qoding.us
DocumentRoot /var/www/speed_dial/public/
ServerAlias speed.qoding.us
<Directory "/var/www/speed_dial/public/">
Options FollowSymLinks IncludesNoExec ExecCGI
AllowOverride All
Order allow,deny
Allow from all
</Directory>
ErrorLog /var/log/httpd/speed-ssl-error.log
CustomLog /var/log/httpd/speed-ssl-requests.log combined
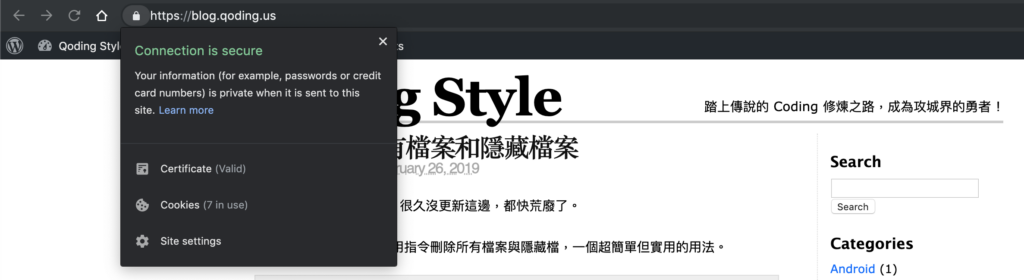
</VirtualHost>再重啟 apache 服務後 SSL 就生效了。不過雖然新憑證已生效,但我原網址用 port 80 的非加密連線也可以打開,我希望都自動轉去加密區,修改 vhost 加上轉址的設定。
<VirtualHost *:80>
ServerName www.yourdomain.com
DocumentRoot /usr/local/apache2/htdocs
Redirect permanent /secure https://yourdomain.com/secure
</VirtualHost>
從此自己的網站們也都有好棒棒又高大上的綠色鎖頭了。
Leave a Reply